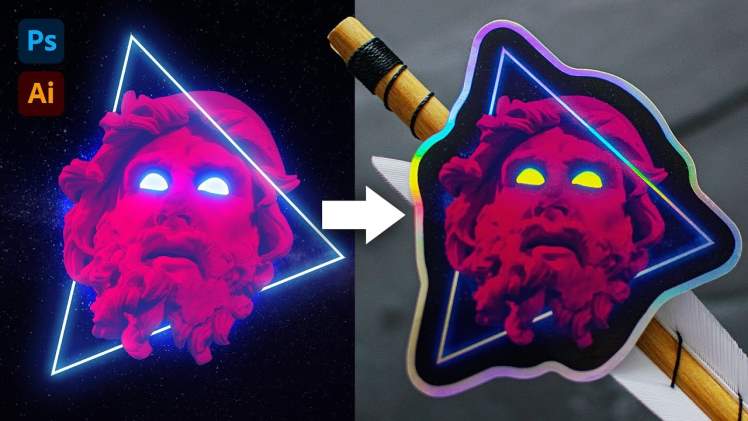
Creating holographic stickers is simple with the right tools. In this article, we’ll show you how to design and print your own holographic stickers using free software and a few supplies. First, select a template or create your own. Next, use the software to slice the file into individual images. Print out the stickers and apply them to objects like cards, bags, and more!
Are you looking to add some holographic elements to your designs? If so, you’ve come to the right place. In this article, we’ll show you how to design holographic stickers using Photoshop and Illustrator.
First, make a file in Photoshop or Illustrator with a basic shape – in this example, we’ll use a square. We’ll call this file “hologram.png.”
Next, we’ll need to create our holographic effect. To do this, we’ll first create a new layer and fill it with black. Then, we’ll create a new layer and fill it with white. Finally, we’ll blend the two layers together by selecting the black layer and clicking on the white layer below it, then dragging down until the entire image is blended together (see image 1).
How do you make holographic stickers?
If you want to create holographic stickers, there are a few different ways that you can go about it. The first way is to use an image processing software like Photoshop or GIMP and use their filters to create the desired effect. You can also buy premade stickers that already have the holographic effects applied, or you can make your own using something like 3D printing. Whichever route you decide to go down, be prepared for some tricky editing work afterwards custom key chains!
How do you make a hologram sticker in Photoshop?
Making a hologram sticker in Photoshop is simple and can be done with just a few steps. First, you’ll need to create a new document and size it to your desired shape. Next, choose the “Hologram” layer from the “Layers” palette and set the blending mode to “Add.” Select the blue and yellow circles in the toolbar and drag them over to your document’s edge. With the circles still selected, press Ctrl+T to merge them together. Finally, use the Eraser tool (E) to erase any unwanted parts of your hologram sticker. You’re ready to start printing!
Visit here for informative about: Vending Machine Business
How do you make Holo prints?
Holo printing is a new technique that uses holograms to create 3D prints. It’s a pretty interesting process and it can create some really beautiful prints. In this article, we’re going to show you how to make Holo prints using a simple software program.
Making Holo prints is a great way to create high-quality, durable pieces of art. It’s also a fun and creative process that can be used to celebrate special occasions or just for fun. Here are some tips on how to make your own Holo prints:
Choose the right software. The first step in making Holo prints is choosing the right software. There are a number of different programs available, and each has its own advantages and disadvantages. Some of the most popular programs include Adobe Photoshop and GIMP, but there are also plenty of other options available.
Get started with basic shapes. Once you’ve chosen your software, the next step is to get started with basic shapes. You don’t need to use complex designs or layers in order to make effective Holo prints; simple shapes will do just fine.
What are hologram stickers made of?
Holographic stickers are made up of a thin sheet of plastic with a hologram printed on it. When the sticker is placed on something, the hologram creates the illusion of 3D. There are many different types of holographic stickers out there, but they all have one thing in common- they’re incredibly cool!
Some examples of holographic stickers that you might find include promotional materials for companies like Apple and Samsung, stickers for making phone calls, and even stickers for adding decoration to your devices!
Though holographic stickers may only be used for decoration at this point, there is potential for them to have a much larger impact in the near future. Already, some scientists are working on ways to use holographic stickers to help diagnose medical conditions or even treat injury. Find more custom key chains.
How are holographic images printed?
If you’ve ever seen a hologram, you’ve experienced what is possible with prints that use holographic images. A hologram is a three-dimensional image that appears to be two-dimensional because the light waves that make it up are scattered in all directions. This technology can be used to create prints that look like they’re made out of pieces of plastic or glass, but the picture is actually made up of millions of tiny circles that can be placed anywhere on the surface of a printing plate. The printer then uses these tiny circles to recreate the image on paper.
Can you laminate holographic stickers?
There are a lot of people who are interested in using holographic stickers in their everyday lives, but not everyone is familiar with the process of laminating them.
If you want to laminate holographic stickers, there are a few things that you need to keep in mind. First and foremost, make sure that the stickers that you’re using are holographic. Second, be sure to use high-quality lamination film. And finally, make sure that the surface that you’re sticking the sticker to is clean and free from oils or other contaminants. If you follow these simple tips, then it should be easy enough for you to laminate your own holographic stickers.
Final Thought:
In conclusion,to create holographic stickers, start by sketching out an idea for the sticker in a rough format. Once you have a general idea of what you want, you can start designing the sticker in Adobe Photoshop or Illustrator. Once you have the design finalized, it’s time to create the 3D files. To do this, use online tools like Hologram Maker or 3D Printing Services. Once you have the files, it’s just a matter of printing and applying!